
Study Breaking Bread
Oh, Libby,
I’ve been studying a bit recently. Which I’m pretty pissed about. Why did nobody warn me 15 years ago that I was picking a profession that requires reoccurring certification and test –taking throughout my lifetime? Where was that in the career counseling handbook? Because - and this is the honest-to-goodness truth - no matter how many tests I take, or years of school and training I have completed, there is always this looming, horrific fear that this, THIS, will be the test I fail. This will be the time they ALL finally figure out that I’ve been just sneaking by the whole time, that I DON’T know what I am doing and that I truly am barely employable.
I still wake up some nights in a cold sweat after a nightmare of walking into some exam, opening the booklet, seeing the first questions and drawing an absolute blank, realizing I had studied all the wrong material or, worse, I hadn’t even known there was an exam at all! Apparently, despite my best attempts at finding my inner Sheryl Sandberg, confidence does not come with age. Neither, unfortunately, does an attention span.
Which brings me back to my “studying a bit” comment. Turns out, I can only get about 45-60 minutes of good studying in before my mind starts wandering and I need a break. Sometimes, it’s to scrape off the dried hummus I suddenly spot on the baseboard (June? Harvey?). Better, though, is when I use that time to produce something worthwhile – namely, something edible. And when you are stuck around the house without a ton of time to devote to the kitchen, but in dire need of intermittent distraction throughout the day, nothing gets the job done quite like bread.
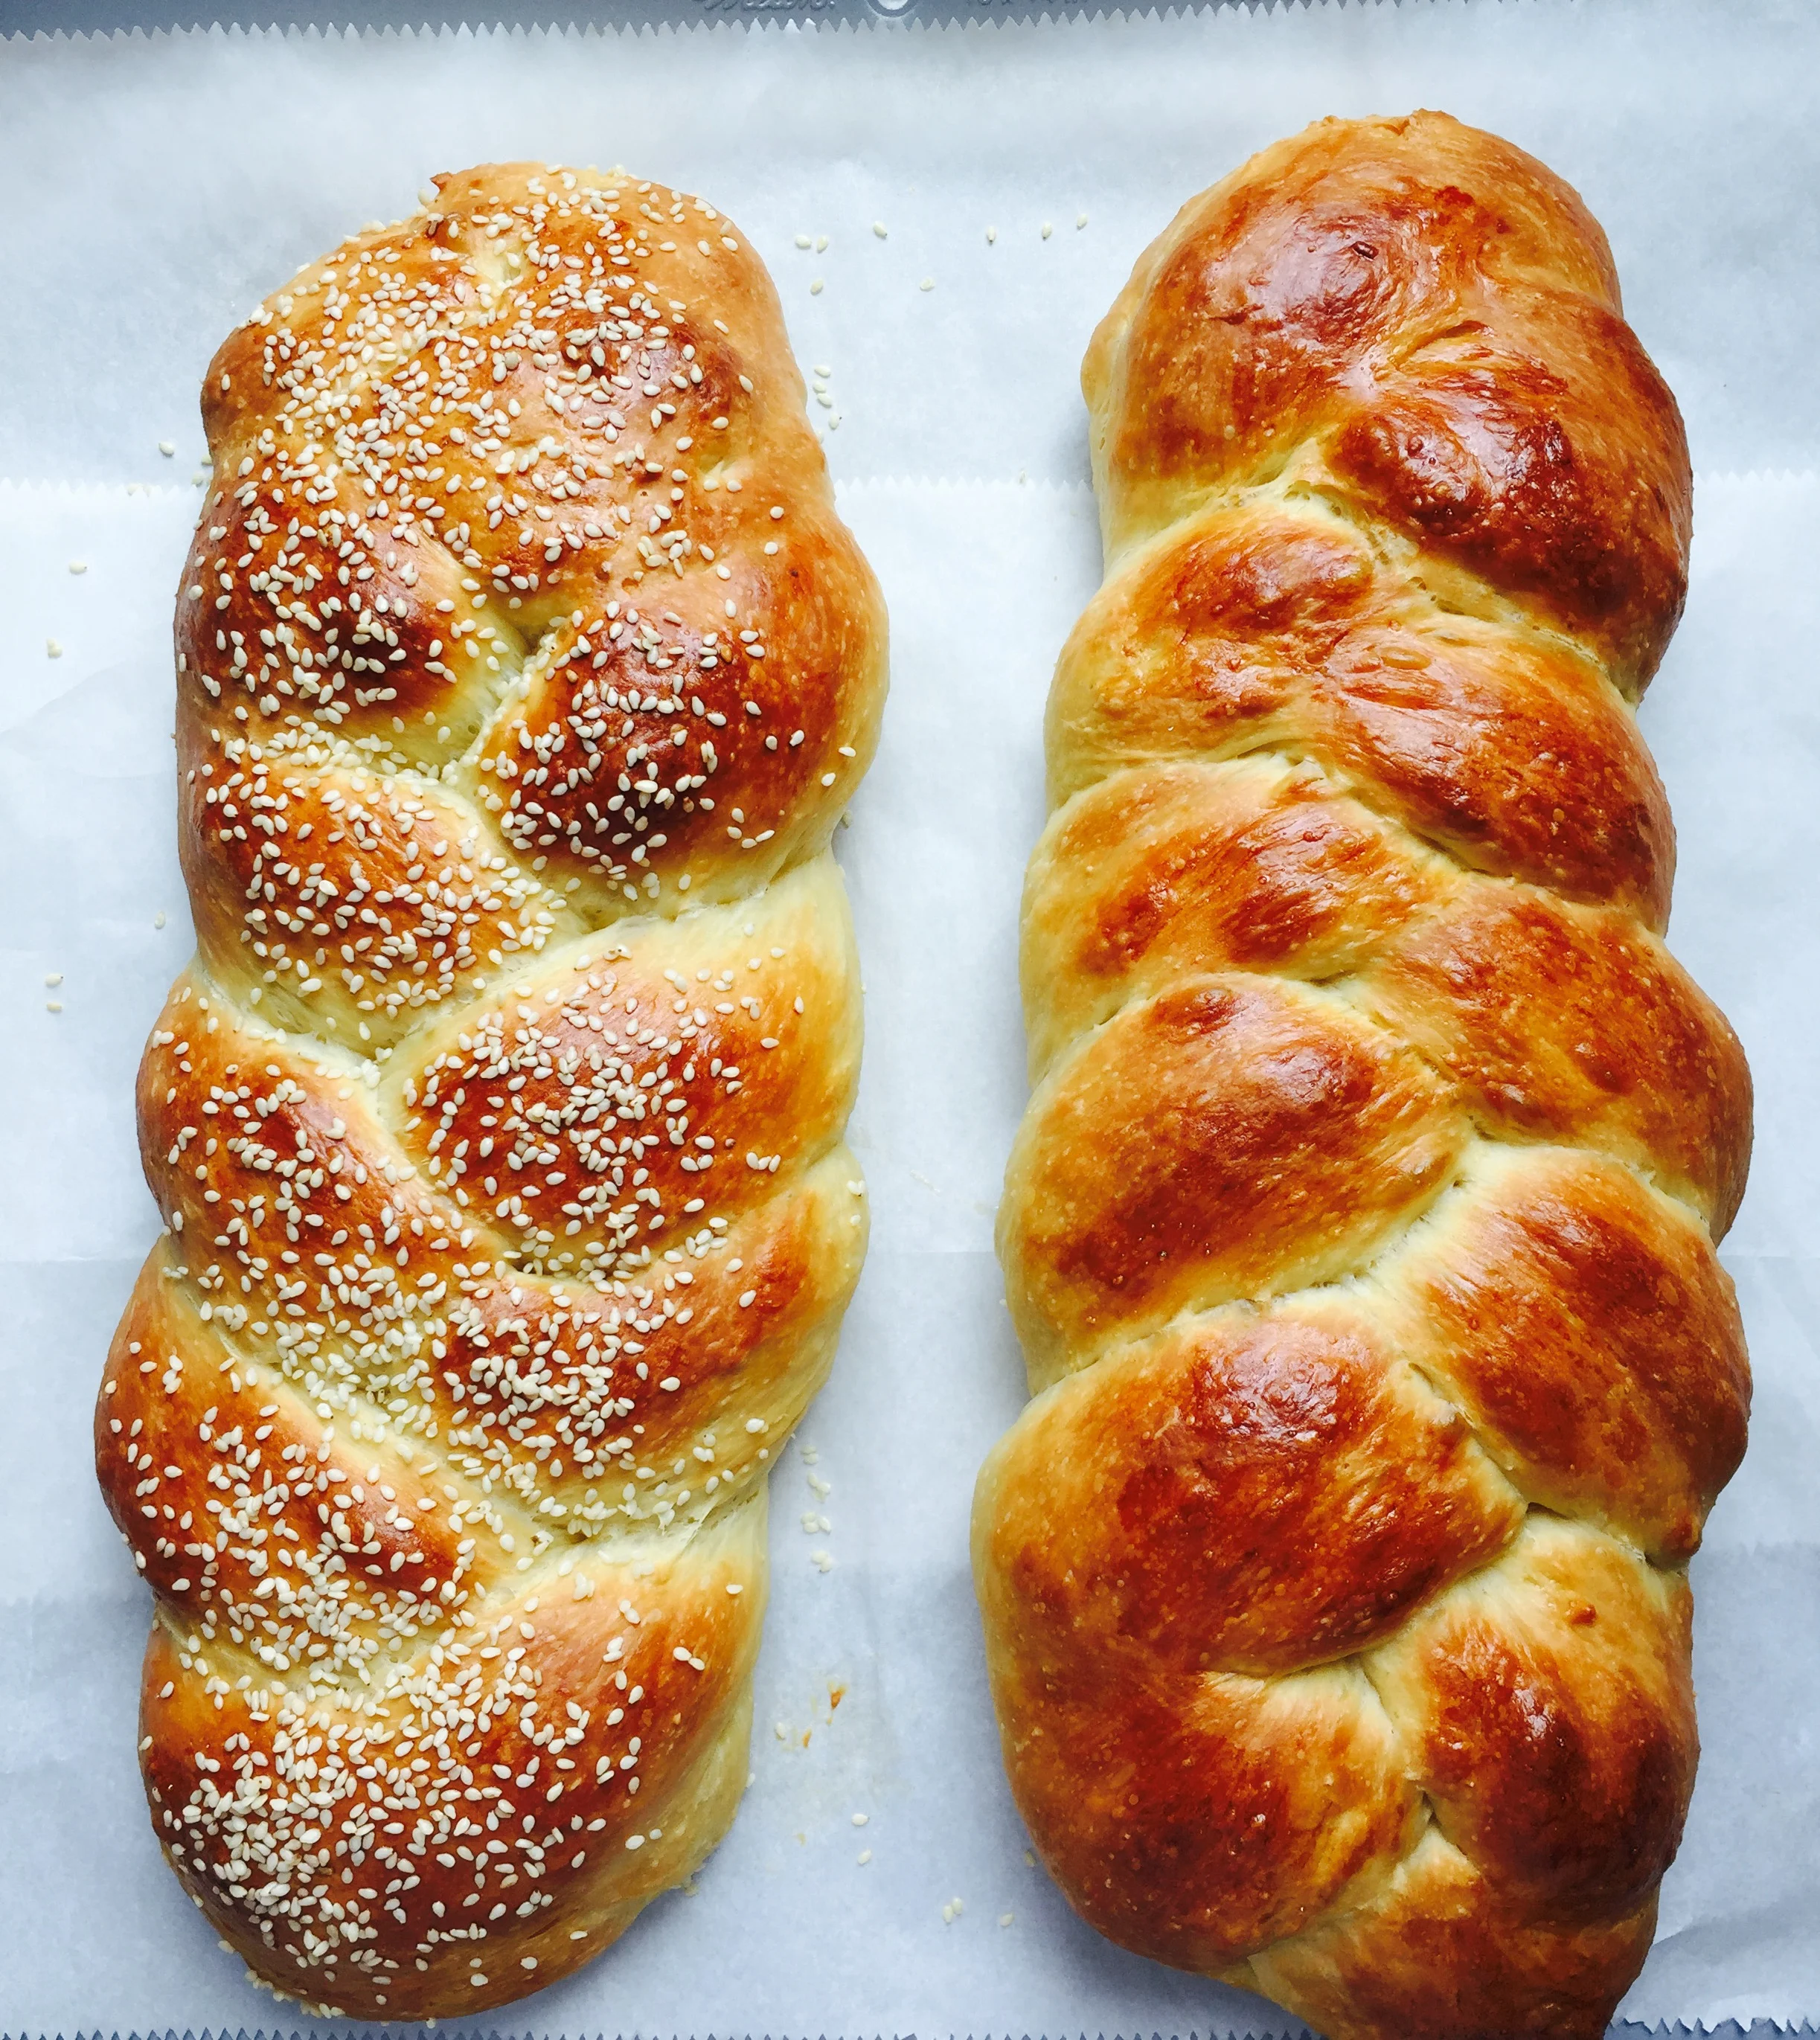
I’ve had my own wild yeast starter going for just under a year, now, and I have slowly been improving on my attempts at crusty loaves of sourdough, semolina, wheat, etc. But with the big Jewish holidays of the year just come and gone, I’ve been on a bit of challah kick. Challah is the skinnier, Jewish cousin of brioche. It’s a little less sweet, with significantly less fat as it does not use butter (keeping kosher and all), but still with that yeasty, eggy, rich flavor and soft, doughy texture. Plus, these differences make it incredibly easy to make, almost regardless of the recipe. That said, my current go-to recipe is the no-knead one from Jessica Fechtor of the blog Sweet Amandine.
It’s an overnight bread, made with standard instant yeast, requiring nothing but a few stirs of a spoon and turns in a bowl. It bakes up quickly and freezes beautifully – not to mention makes killer sandwiches, bread pudding and French toast (though, truth be told, when asked what she thought, June confessed to me with total sincerity, “I’m just not that into it.” She did have the courtesy to look a little ashamed, when I reacted with shock and horror. Tygh, love him, assured her that it’s ok to be wrong).
So while 14+ years of job-related exam taking hasn't gotten any easier, I can say with confidence that baking bread has. And, either way, I know I gave both the more-interrupted-but-no-less-dedicated old college try. At the very least, I'll have a freezer full of challah to show for it.
Challah (the no-knead, no-fuss, overnight kind)
4 C (500g) bread flour
1 ½ tsp instant dry yeast
2 tsp fine sea salt
2 large eggs, plus one large egg yolk (save extra white in fridge for glazing later)
¾ C (190 g) water
1/3 C (75 g) olive oil
¼ C (85 g) honey
Seeds, any kind, for sprinkling before baking (I use sesame, 'cause that's what we always had growing up).
1. Whisk together the first three dry ingredients in a large bowl. Whisk the remaining wet ingredients in a separate, small bowl. Pour wet into dry and stir with a wooden spoon until a wet, sticky dough forms. Cover with plastic wrap and let sit for 10-20 minutes.
2. Remove plastic wrap and lift one edge of the dough, folding it on itself back towards the center. Turn the bowl a bit and repeat, until you have done each side of the dough, about 6-8 turns in total. Now flip the dough so that the folds you have created are on the bottom. Cover tightly again with plastic wrap and let sit for 30 minutes.
3. Repeat this fold, flip, cover and rest routine four more times. Initially, the dough will be all floppy, but over time, and as the gluten develops, it will become aerated and elastic – you will start to see little gas bubbles forming in the dough.
4. Cover again with the plastic wrap and refrigerate for 16-24 hours.
5. Cover a baking sheet with parchment paper and set aside. Divide dough in half and then each half into thirds. Roll each third into a strand, about 12 inches long and 3/4 inch in thickness. Use flour if needed, but sparingly so. Form two, three strand braids and transfer to the parchment-covered pan.
6. Cover with plastic wrap and let proof at room temperature for 2 to 3 hours – shorter in a warmer room, longer if your kitchen is cool. The dough will puff up over time and should bounce back very slowly, if at all, when pressed with your finger.
7. Preheat oven to 375F. To bake, brush tops with egg white and sprinkle on seeds, if using. Bake for 20-22 minutes, until bread is golden and tester inserted comes out clean – you should smell the bread throughout your house.
Let cool on racks.
If freezing, wrap cooled bread well in plastic wrap, then Ziploc bags. To thaw, do so in the bag, on the counter top, reheating in a warm oven once thawed.
Adapted from Jessica Fechtor by way of Food52